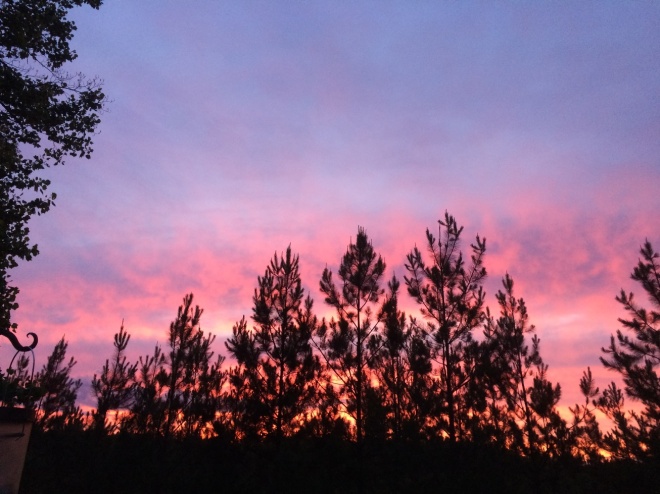
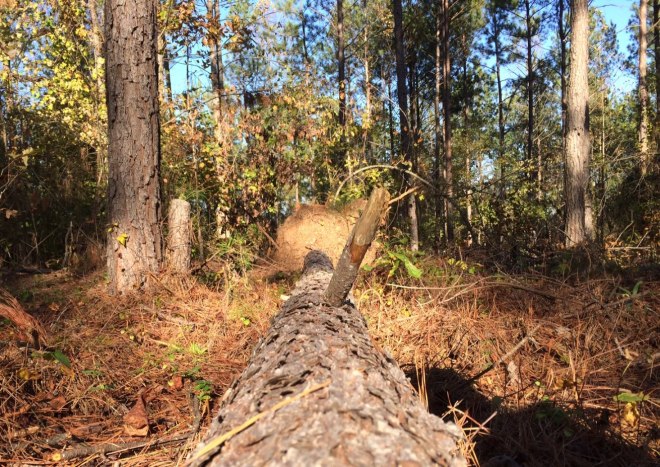
I live among pine trees, planted Loblolly pines, with my husband on his family’s century farm so for my block I decided to design a pine tree block, Planted Pines. It was a gorgeous fall day, just look how blue the sky was in this unedited photo.
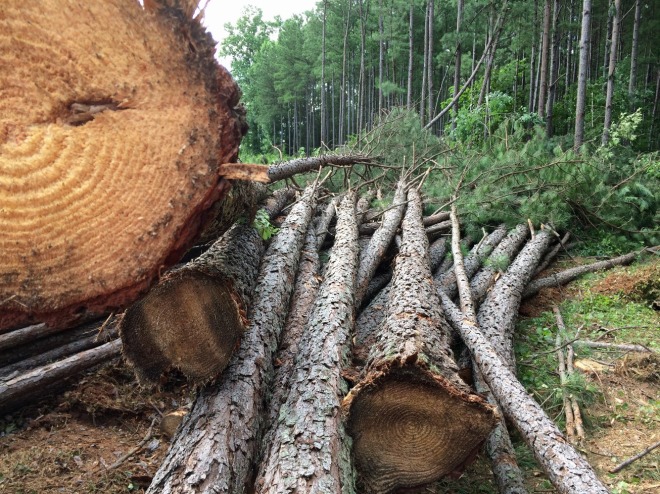
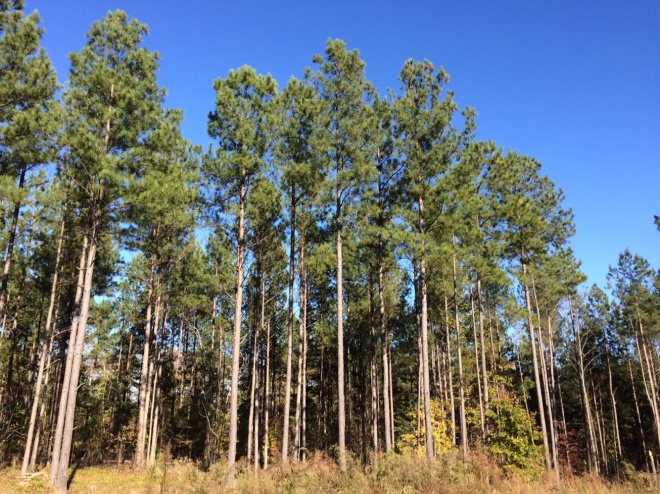 These pines have just been thinned (for the 2nd time) and will be clear-cut in another 10 years or more. Then, the process of planting and cutting will start all over again making forestry a natural renewable resource.
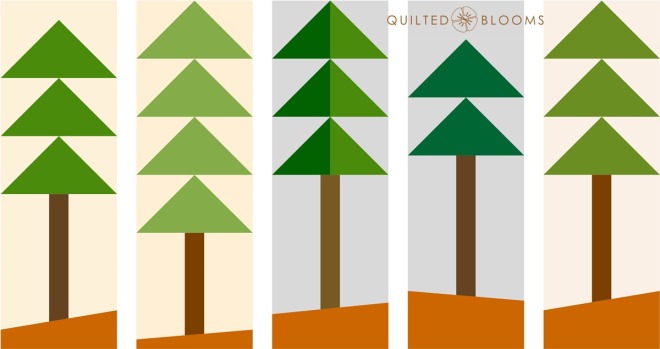
In the tree farming business, the tallest and straightest pines trees are most desirable bringing the most money at saw mill. That’s why I designed my Planted Pines quilt block to be tall and lean just like the pine trees.
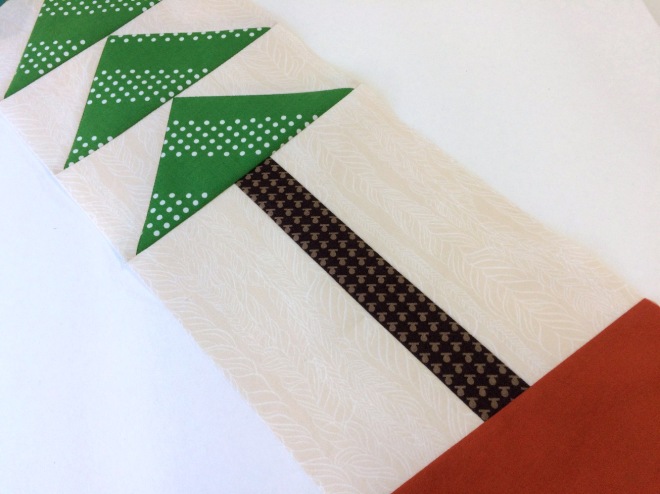
Planted Pines Blocks
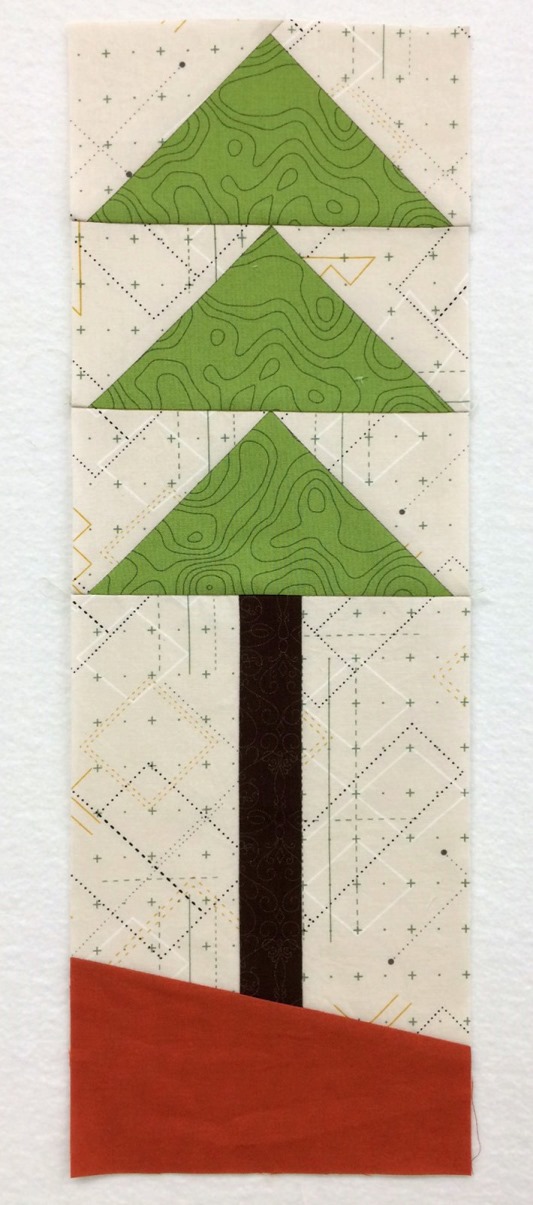
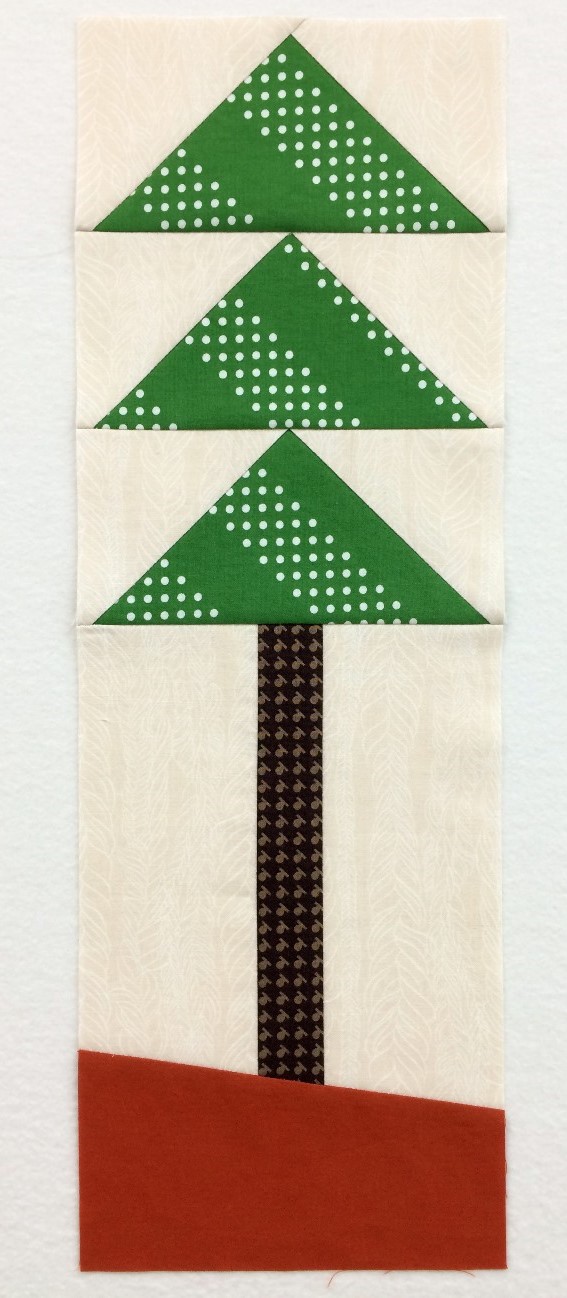
Planted Pines blocks finish at exactly 6″ in width and approximately 18″ in height (give or take). Unfinished size is 6 1/2″ x 18 1/2″. The blocks are constructed from flying geese units, a tree trunk section and the ground, or more commonly referred to around here as red hills in the upstate of South Carolina.
Here are a few examples of planted pines blocks. As you can see, they can be constructed from two, three or four flying geese units or half triangles if you wish. How large or small and the degree of the angle for the ground is up to you. You are welcome to add a bit of background to increase the length of your Planted Pines block.
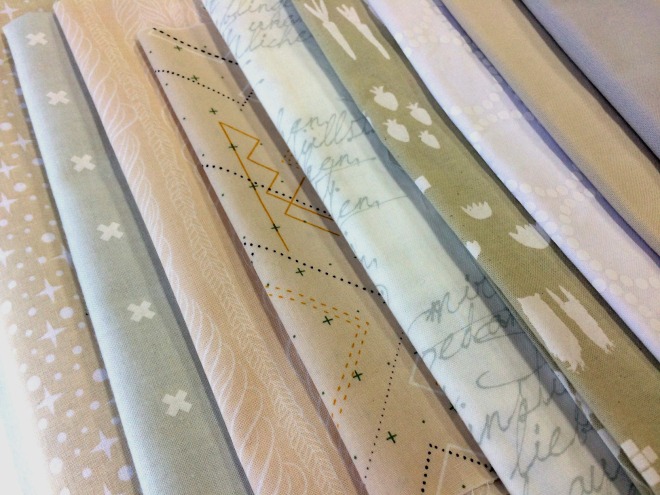
 Planted Pines are constructed from a variety of more earthy greens in solids, tone-on-tones and prints with very little colors other than neutrals. There are exceptions, a tree would be beautiful in this Kaffe Fassett print which includes a little purple.
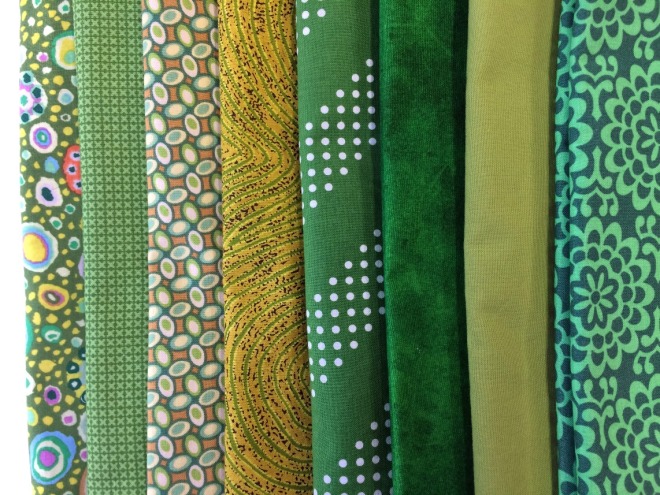 For the tree trunks, any browns from solids to tone-on-tones will work fine. And for the backgrounds please use creams, light tans, light gray, white or low volume. Here are some examples.
 Fabric for the ground or red clay has been mailed to everyone. It’s burnt orange from In The Beginning Fabrics. I included 2 patches should you be industrious, but one will be appreciated.
I’ve made two blocks so far…
 Now you have the idea, let’s start piecing Planted Pines.
Flying Geese Units
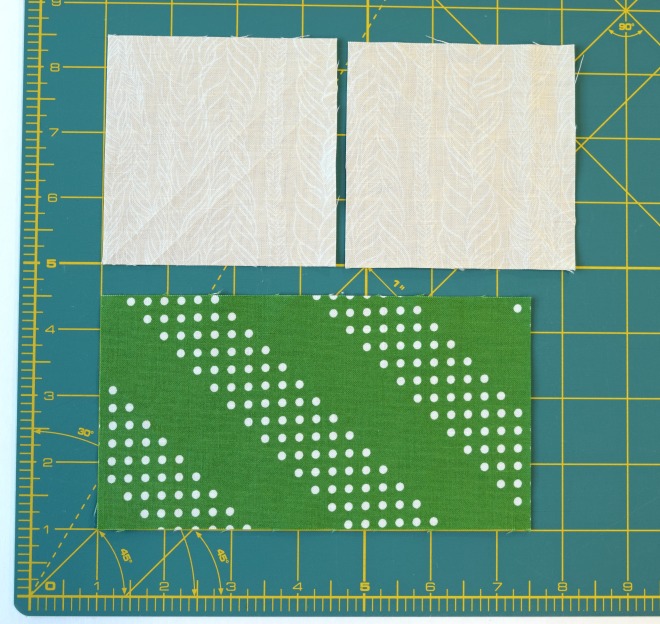
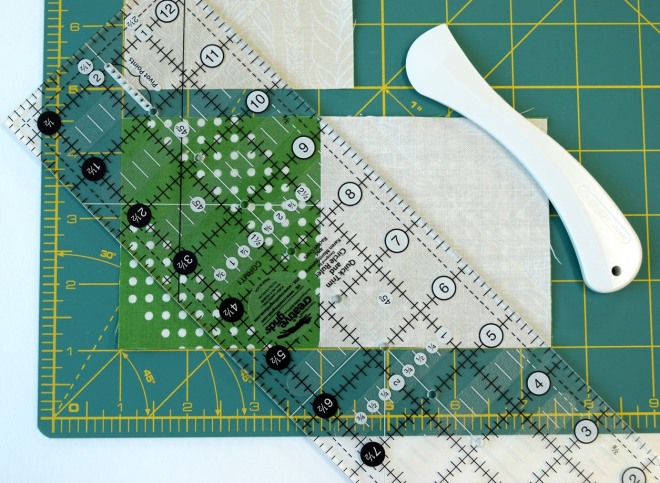
We will start with the Flying Geese units. These measurements are for the sew and flip method for 1 flying geese unit, but you are welcome to use the 4 at a time method.
You will need:
- (2) Background squares 3 1/2″ x 3 1/2″
- (1) Green rectangle 6 1/2″ x 3 1/2″
 Draw a line diagonally from corner to corner, I used a hera marker. I also marked a line 1/2″ away from the first line. I plan to make bonus half square triangles (HSTs).
 Stitch on one or both lines.
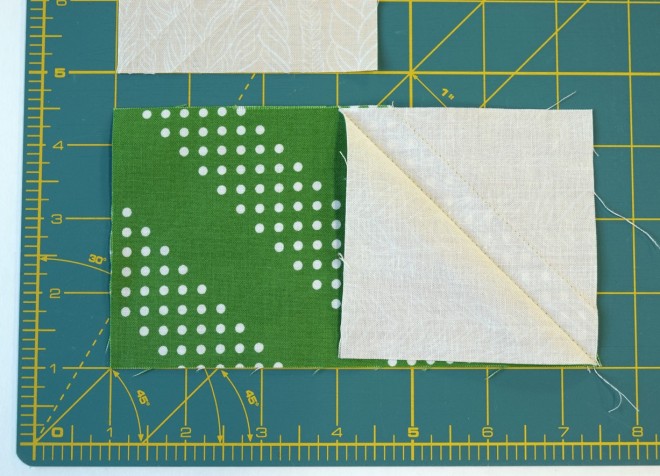 Trim the seam allowance to 1/4″ or cut between the two sewn lines. TIP: If you press and set the seam(s) before you trim, you will have less distortion when pressing the bias seams. Since I am making the bonus HSTs, I flipped the unit over and pressed the seam toward the dark.
 Repeat with the other background square on the opposite side.
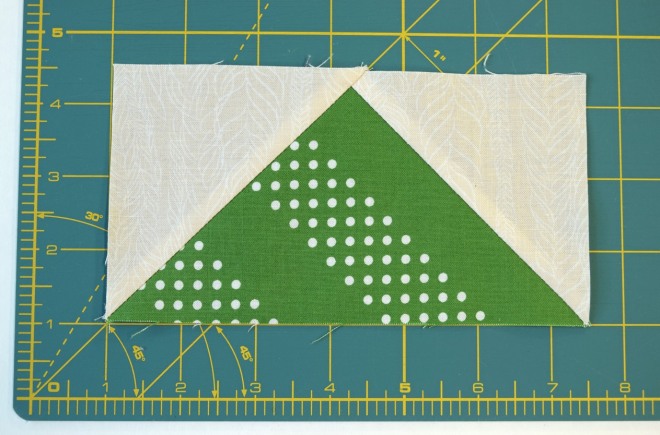
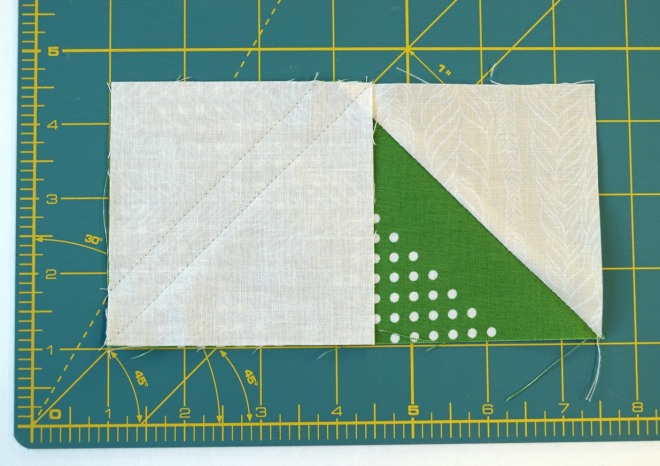 And now you have one flying geese unit. Repeat to make a total of 2, 3 or 4 flying geese. Sew the geese together with a scant 1/4″ seam. Press the seams toward the top of the tree.
Update 11/1/17 – For making flying geese using the 4 at a time no waste method: Cut (1) green square 7 1/4″ and (4) background squares 3 7/8″. Generations Quilt Patterns has a nice tutorial.
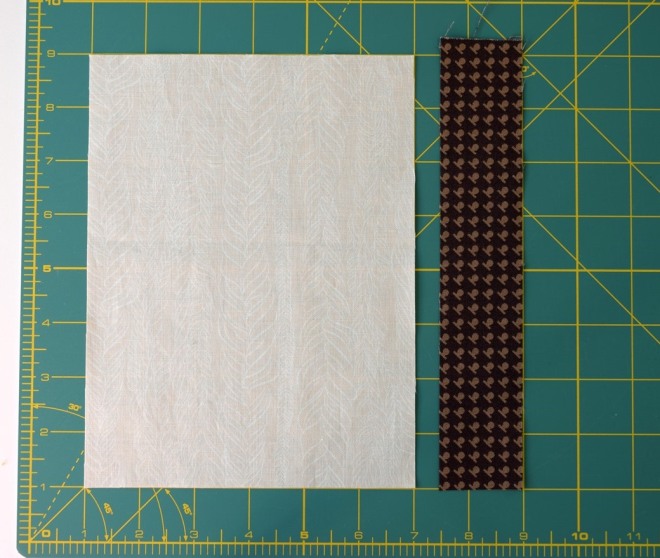
Tree Trunk
Let’s move on to the tree trunk. The measurements here will result in a tree trunk that finishes at 1″ wide. But feel free to adjust your cutting to make a skinnier or fatter tree. You will need:
- (1) Background rectangle 6″ wide x approximately 8″ long (can vary depending on the number of flying geese units your plan to incorporate in to your block)
- (1) Brown rectangle 1 1/2″ x approximately 8″ long
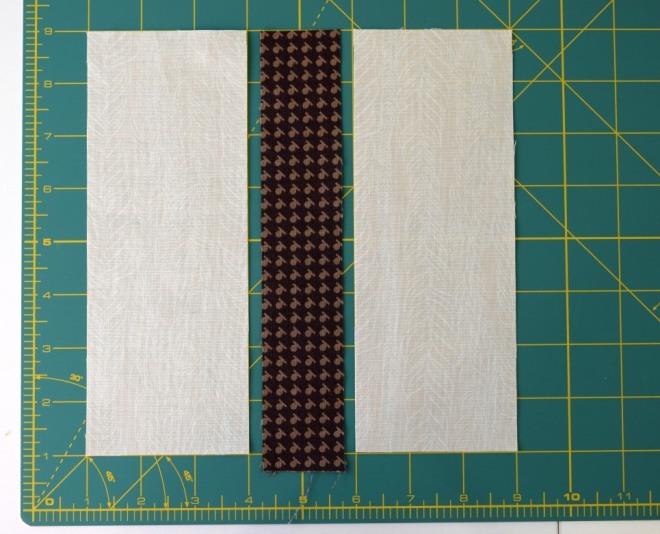
 Cut the background rectangle in half lengthwise resulting in two smaller rectangles measuring 3″ x 8″ approx.
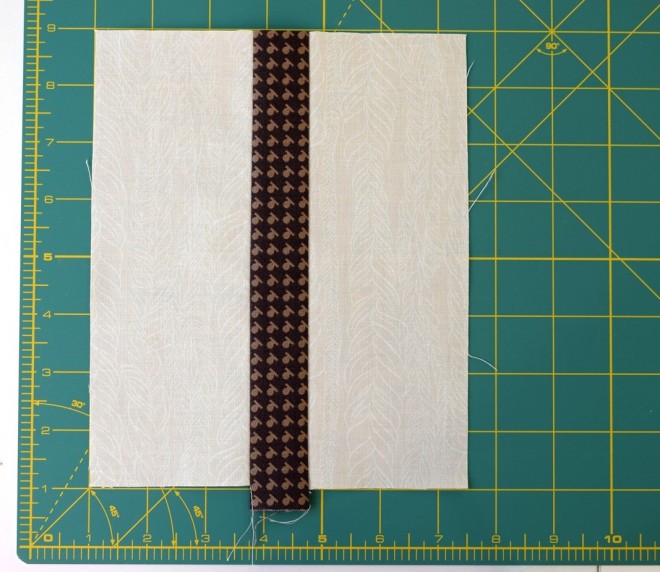
 Sew the trunk between the two background rectangles. Press the seams toward the trunk (dark). The important measurement here is the width of the unit which should be exactly 6 1/2″ wide. Trim or square up the sides and the top of the tree trunk unit if necessary.
The Ground or Red Hills
I live right at the edge of the mountains so the landscape around here is anything but level. Feel free to make your ground as steep as you like. I will show you how to maintain the straight of grain while piecing the trunk and ground together. You will need:
- (1) Ground rectangle 7″ x 4″ (approximately)
- (1) Tree Trunk unit
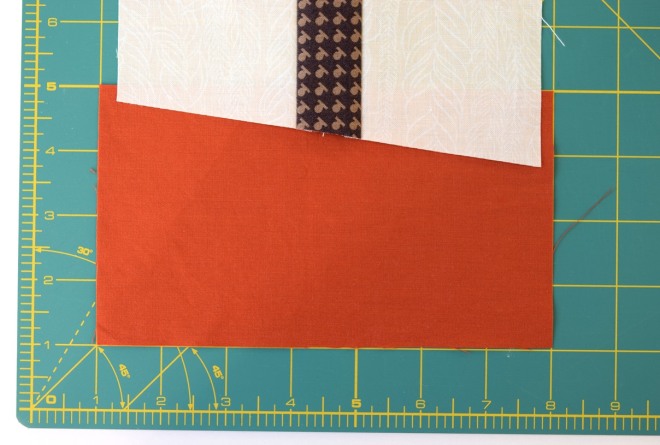
Lay the tree trunk unit on your cutting mat and decide the angle of your ground. You can audition the slope with your ruler.
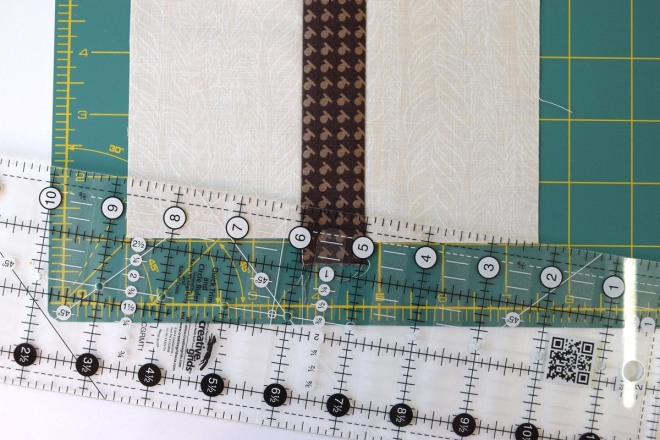 Leave your ruler in place and make the cut.
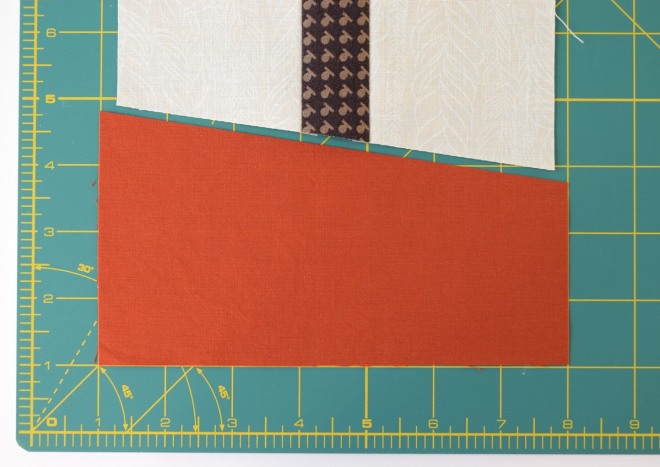
 Lay the ground rectangle on your cutting mat like so. Place the tree trunk unit over the ground fabric centering it from side to side and keeping the sides parallel to to the lines on your cutting mat.
 Place your ruler along the bottom edge of the tree trunk unit and cut on the angle.

The tree trunk and ground should look like this. The ground should be wider than the tree trunk unit.
 Flip the tree trunk unit down toward the ground and align the raw edges. The ground fabric should extend beyond the tree trunk on both sides.
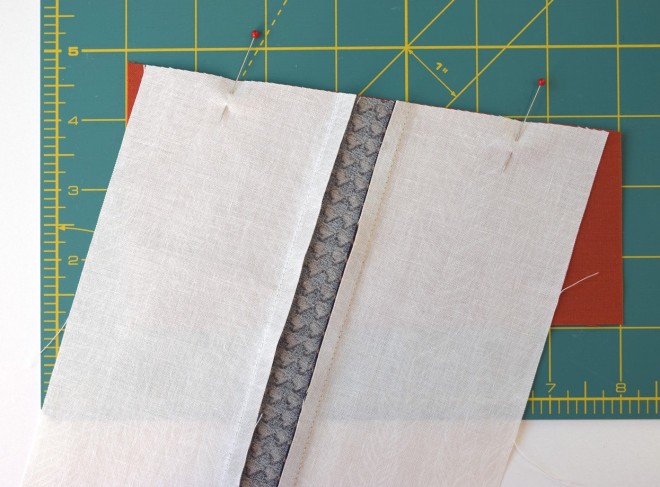 Stitch with a scant 1/4″ seam allowance. Press the seam toward the ground fabric.
 Trim the ground to 6 1/2″ wide. A 6 1/2″ rule makes trimming a breeze.
 See how center of the center of the ruler goes right down the center of the tree trunk?
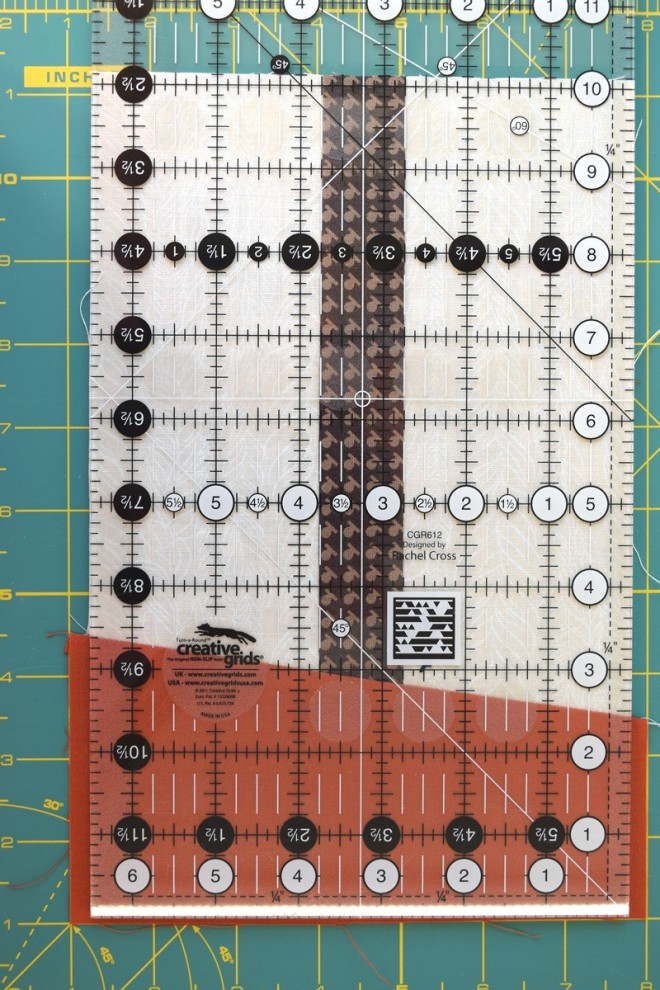 It should look like so after trimming up, 6 1/2″ wide by aprox. 10″ tall.
 Join the flying geese and tree trunk/ground to complete the block. The block should be 6 1/2″ wide. The length should be approximately 18 1/2″, but if it is shorter or longer, it’s fine and you’ll see why in a bit. Congratulations, you’ve completed a Planted Pines block.
More about the Trees and Ground
This is a beautiful sunset behind the pines.
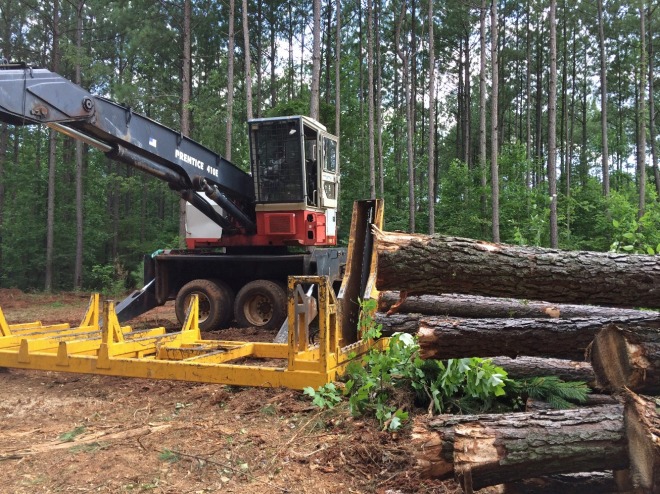
 The trees were thinned this summer and here is a glimpse of the operation.
 The trees are sorted into chip-n-saw for making waferboard used in new construction and into pulp wood for making paper. I would like to think its going to make the cardboard bolts for holding fabric but there’s no way to know.
The trees are cut to length for hauling. Look at the size of that blade.
 There is always the chance of loosing trees from high winds or ice build up. This tree was blown over in a recent storm.
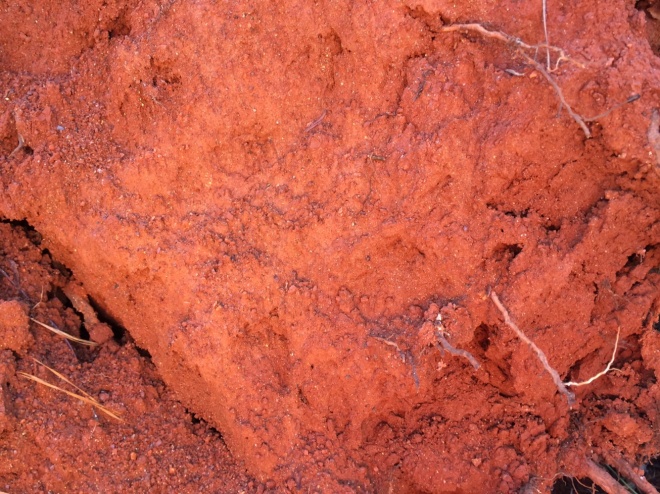
 I’m not exaggerating about the color of the red clay in the soil. This is a photo of the root ball from the fallen tree. That’s why I picked out this solid from In the Beginning Fabrics. The color is burnt orange and I found it at my local quilt shop.
Planted Pines Quilt Layout
This is the layout I have planned for the Planted Pines quilt blocks. The blocks will be sewn into vertical rows with spacing added as needed to complete each row. That’s the reason why the length of the blocks is not as critical.

I plan to make a lap quilt. I mailed each of my Bee Inspired bee mates 2 pieces of ground fabric, but if you only have time for one block, that’s just fine. I look forward to building my tree farm from your blocks. Please share your block(s) on social media #PlantedPinesQuilt and tag me @QuiltedBlooms.

Great quilt design!
LikeLike
Thank you, Moria! I wanted to make a personalized block and hope my bee mates will enjoy making Planted Pines!
LikeLike
I love this, Paige! And as someone who has similar soil, I can verify that the color looks perfect!
Do you happen to know the needed measurements if one uses the 4-at-a-time method for the geese?
LikeLike
Emily, so you know exactly what red clay is all about!
I just updated the Flying Geese Units instructions to include the measurements and a link to the no-waste method.
LikeLike
We also have red earth here on PEI. I love this quilt plan and cannot wait to see the finished project.
LikeLike
Pingback: Tu-Na Quilts: February Goal | Tu-Na Quilts, Travels, and Eats
Pingback: Tu-Na Quilts: Making Time to Sew | Tu-Na Quilts, Travels, and Eats